How to Remove Oxidation from Your RV (Step-by-Step Guide)
That chalky, faded look creeping across your RV’s exterior is one of the most common frustrations RV owners face. Oxidation strips away the vibrant finish of your vehicle, leaving it looking neglected and worn, even if it’s mechanically in perfect shape. The good news is that you don’t need to be a professional detailer or spend a fortune at a shop to fix it.
Learning how to remove oxidation from your RV is a straightforward process that any beginner can tackle with the right guidance, a few quality products, and a free afternoon. In this step-by-step guide, you’ll discover exactly what causes oxidation, how to assess the severity of damage on your RV, and which tools and compounds will get the job done effectively. We’ll walk you through each stage of the restoration process in clear, simple terms so you can approach this project with confidence.
By the time you finish reading, you’ll have everything you need to bring your RV’s finish back to life and keep it protected for the seasons ahead.
How to Assess Your RV’s Oxidation Severity Before You Start
Before you touch a single product or tool, you need to understand exactly what you are dealing with. Oxidation on RV gelcoat surfaces is not one-size-fits-all, and misreading the severity is one of the most common mistakes beginners make. Fortunately, a quick visual inspection combined with two simple hands-on tests will tell you almost everything you need to know.
The Three Visual Tiers of Oxidation
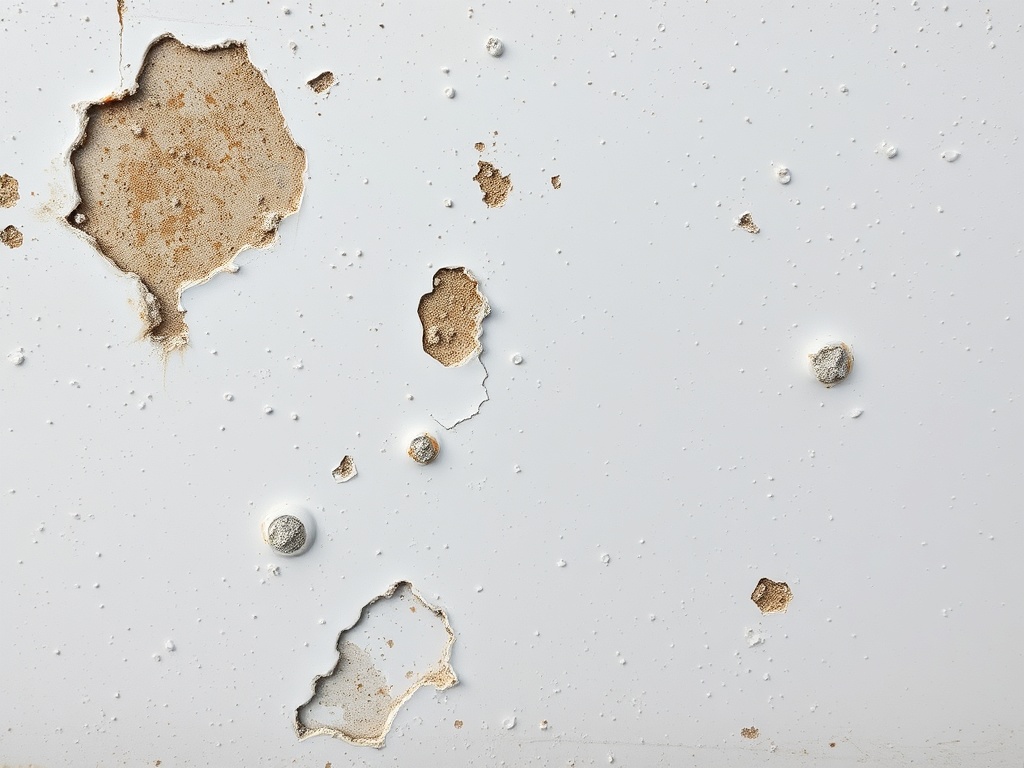
Gelcoat oxidation progresses in stages, and learning to identify each one is your first critical skill. Light oxidation presents as a faint chalky film or mild haze across the surface, but some sheen or gloss is still visible, particularly in direct sunlight. The texture still feels relatively smooth to the touch. Moderate oxidation is noticeably more serious; the finish looks deeply faded and matte, the surface feels rough or gritty, and any gloss is largely gone. Severe oxidation is the most alarming stage, showing widespread color loss, heavy chalkiness, pitting, and in some cases flaking or crumbling gelcoat. Exposed fiberglass patterns may even become visible beneath the surface. According to detailing experts who specialize in fiberglass travel trailers, oxidation typically becomes visible within 1 to 2 years on unprotected gelcoat, and it accelerates rapidly without intervention.
The Fingertip Swipe Test
Once you have done a visual inspection, confirm your assessment with a simple fingertip swipe test. Press a clean, dry finger firmly against the surface and drag it a few inches. Then check what transferred. Minimal residue suggests light oxidation. A noticeable white powdery film points to moderate damage. Heavy chalk transfer combined with a dry, rough feel signals severe oxidation. This test adds a tactile dimension to your diagnosis that a visual inspection alone can miss, especially on lighter-colored RVs where fading is harder to see.
The Water Bead Test
The water bead test reveals the remaining health of your gelcoat’s protective layer. After rinsing a small section clean, spray water onto the surface and watch what happens. Healthy gelcoat with intact protection causes water to bead tightly and roll off quickly. If water sheets across the surface, spreads flat, or appears to absorb into the material, the gelcoat is compromised and oxidation has already eroded its hydrophobic properties. As gelcoat restoration guides confirm, a surface that fails the water bead test almost always requires compound-level correction before any protection can be properly applied.
Why This Assessment Step Determines Everything
Accurate severity assessment is not optional; it directly controls which products, tools, and techniques you should use. Light oxidation is genuinely DIY-friendly using mild cleaner waxes and hand application. Moderate cases require dual-action polishers and cutting compounds, raising the skill and time commitment considerably. Severe oxidation often demands rotary buffers, aggressive compounds, or even wet sanding, and the risk of burning through the thin gelcoat layer is real for inexperienced hands. Attempting severe restoration without proper equipment frequently causes more damage than it corrects. Knowing your severity level upfront saves time, protects your investment, and helps you make an honest decision about whether a professional RV detailing service makes more sense for your situation.
What You Need to Remove RV Oxidation (Tools and Products)
Now that you understand your RV’s oxidation severity, gathering the right tools and products before you begin will save you time, frustration, and potential surface damage.
Essential Tools
A dual-action (DA) polisher or random orbital is the single most important tool in your arsenal. For beginners, a DA polisher is the safer choice because it reduces the risk of burning through the gelcoat compared to a high-speed rotary buffer. Pair your machine with foam and microfiber cutting pads for the compounding stages, and softer finishing pads for the final polish step to eliminate swirl marks and restore gloss. You will also need a generous supply of clean microfiber towels for wiping away compound residue between stages. Finally, keep a spray bottle filled with an isopropyl alcohol (IPA) solution (roughly 50/50 IPA and water) on hand to wipe panels clean before applying sealant or ceramic coating, ensuring no oils or residue interfere with adhesion.
Products by Severity Tier
Matching your product to your oxidation level is critical. For light to moderate oxidation, Meguiar’s Marine/RV Heavy Duty Oxidation Remover #49 is a proven choice; it uses diminishing abrasives and feeder oils specifically formulated for gelcoat surfaces. For moderate to severe cases, reach for a product like 3M’s gelcoat-specific heavy cutting compound, which removes deep oxidation and P800+ scratches while leaving a workable surface for follow-up polishing. After compounding, apply a dedicated finishing polish on a soft pad to eliminate any haze or swirl marks left behind. The final and non-negotiable step is protection; apply a RV/gelcoat sealant or a professional-grade ceramic coating to lock in your results and shield against UV damage.
Why RV-Specific Formulas Matter
RV gelcoat is thicker, harder, and more porous than the clear coat found on automotive paint. Standard automotive compounds are typically too mild to cut through oxidized gelcoat effectively, often producing disappointing results after considerable effort. Marine-grade and RV-specific formulas from brands like Meguiar’s and 3M are engineered with the abrasive strength and chemistry that gelcoat actually requires, making the process faster and more thorough.
Household Alternatives and Their Limits
Diluted white vinegar can reduce very mild surface haze by dissolving surface-level mineral deposits and oxides. However, vinegar provides absolutely zero UV protection, meaning oxidation can return within weeks without immediate follow-up using a quality sealant or wax. Treat vinegar as a last-resort option for superficial haze only, never as a replacement for proper compounding and protection on a noticeably chalky surface.
Always Test First
Before committing to any product or pad combination across your entire RV, test everything on an inconspicuous 12-inch panel away from graphics, decals, and seams. Gelcoat formulations vary between manufacturers and model years, and what cuts cleanly on one surface may create holograms or discoloration on another. A quick test panel takes five minutes and can prevent irreversible damage to a highly visible section of your RV.
Step 1: Thoroughly Wash and Decontaminate the RV Surface
Before a single drop of compound ever touches your RV’s gelcoat, the surface must be completely clean and decontaminated. This is not optional preparation, it is the foundation that determines whether your correction work succeeds or causes further damage. Running an abrasive compound over a surface that still holds dirt, grit, or embedded debris is like sanding with sandpaper covered in gravel. Those particles grind directly into the gelcoat, creating deep scratches and swirl marks that are far more difficult to remove than the original oxidation. A proper wash and decontamination session takes time, but it protects every hour of work that follows.
The Two-Bucket Wash Method
Fill two buckets before you begin. One holds your RV-safe, pH-neutral soap mixed with water, and the other holds clean rinse water, ideally with a grit guard insert sitting at the bottom. Harsh detergents and dish soaps strip protective coatings and accelerate gelcoat breakdown, so stick with a product formulated specifically for RVs. Start at the roof and work your way down in manageable sections, rinsing your wash mitt in the clean bucket before reloading it with soapy water each time. This cross-contamination prevention is exactly why the two-bucket system exists. Pre-rinse the entire RV first to knock loose surface dirt, and wash in the shade or during cooler parts of the day to prevent premature drying and water spotting. You can find additional RV washing guidance from PoliGlow that reinforces this top-to-bottom approach.
Clay Bar and Chemical Decontamination
Once the wash is complete, run a plastic bag over a clean panel. If you feel roughness or texture, bonded contaminants are still present. Road tar, rail dust, mineral deposits, and industrial fallout bond chemically to gelcoat and washing cannot lift them. A clay bar, used with a dedicated clay lubricant or soapy water, physically pulls these particles free when glided across the surface in straight lines. For iron contamination, a spray-on iron remover will turn purple on contact and dissolve the particles before claying. Work one panel at a time, folding the clay regularly to expose a clean face.
Drying and Biological Contamination
After decontamination, rinse the entire surface thoroughly and dry it completely using plush microfiber drying towels or a leaf blower on a low setting. Water spots left behind introduce mineral residue that interferes with polish adhesion and creates uneven correction results. Work top to bottom and avoid letting any section air-dry in direct sunlight.
If you notice any mold or mildew, particularly along the roofline, awnings, or areas kept in shade during storage, address it now rather than after correction. Apply a diluted mildew cleaner or a mild bleach-and-water solution, agitate gently with a soft brush, and rinse completely. Proceeding over biological contamination spreads spores across the surface and compromises the clean base you need. For a detailed overview of the full oxidation removal process, reviewing professional prep standards can help you confirm you have not missed anything before moving forward to correction.
Step 2: Remove the Oxidation (The Correction Stage)
With your RV freshly washed and decontaminated, you are now ready for the most critical stage of the entire process: physically removing the oxidation from the gelcoat surface. The technique and products you use here depend entirely on the severity level you identified during your assessment. Work methodically, follow the right approach for your situation, and you will see a dramatic transformation in surface clarity.
Light Oxidation: Foam Pad and Medium-Cut Compound
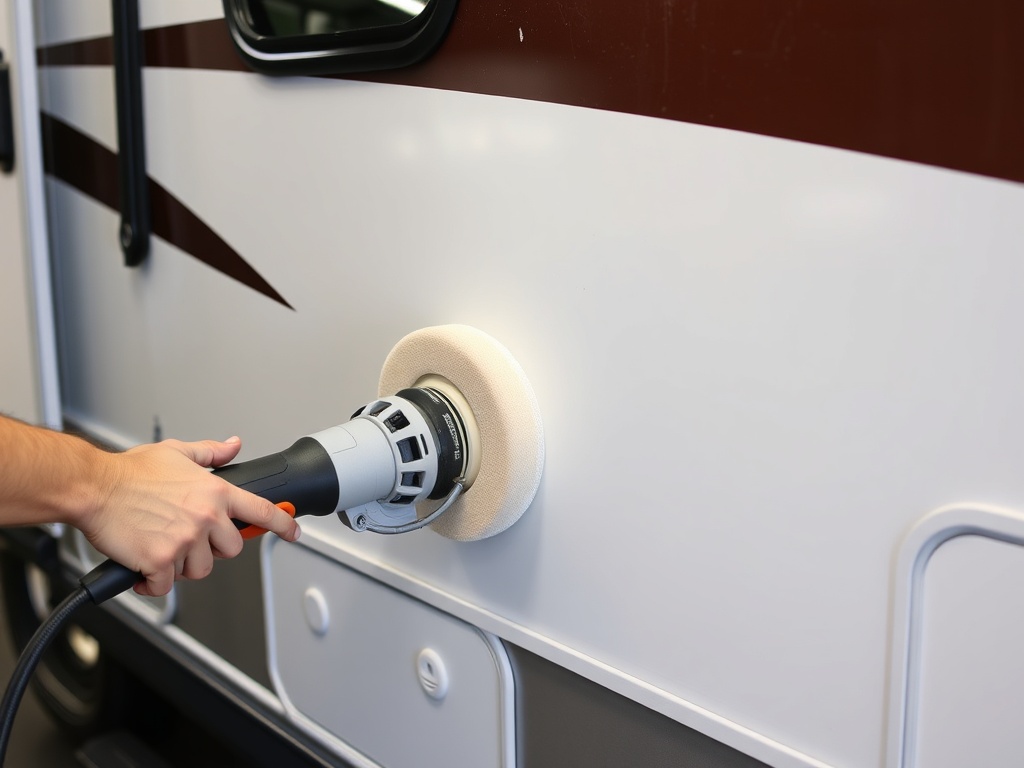
For mild chalking or early dullness, a medium-cut compound or a dedicated oxidation remover applied with a foam polishing pad on a dual-action (DA) polisher at low speed is the right starting point. Apply a few dime-sized drops of compound directly to the pad, then spread the product across your 2x2-foot section before increasing speed. Use overlapping passes with roughly 50% overlap in a consistent horizontal or vertical pattern to ensure even coverage across the entire area. Work the compound until it begins to break down and a light haze forms on the surface, then wipe the residue away immediately with a clean microfiber towel. If dullness remains after the first pass, apply fresh product and repeat. This controlled approach removes surface oxidation without aggressive cutting, which significantly reduces the risk of swirl marks in the gelcoat. Many beginners find that a methodical section-by-section technique produces far more consistent results than rushing across large areas.
Moderate to Severe Oxidation: Cutting Compound and Higher Aggression
When oxidation runs deeper, a heavier cutting compound paired with a wool pad or firm foam cutting pad on a DA polisher is required. Once product is spread across the section, increase your polisher speed and apply moderate downward pressure to generate the friction needed to cut through the damaged gelcoat layer. Expect to make anywhere from two to five passes on badly affected areas before surface clarity begins to return. Heavy oxidation generates significant residue as the compound lifts degraded material from the surface; clean your pad frequently using a pad brush or by tapping it out, because a loaded pad loses its cutting ability quickly. After achieving correction, follow up with a medium or finishing polish on a softer foam pad to refine the surface and remove any haze left by the cutting compound. Skipping this refinement step leaves micro-scratches that are visible in direct sunlight.
Wet Sanding: A Last Resort for Deep Pitting
When compounding alone cannot remove severe pitting or heavily embedded oxidation, wet sanding levels the surface before polishing begins. Start with 800 to 1000 grit wet/dry sandpaper, keeping both the surface and the paper thoroughly wet with soapy water throughout the process. Progress to 1200 and then 1500 grit to reduce the scratch pattern before transitioning to compounds. Wet sanding must always be followed by multiple polish stages, moving from a heavy-cut compound down to a finishing polish, to fully restore gloss and remove all sanding marks. This process removes a measurable amount of gelcoat, so test on an inconspicuous area first and avoid over-sanding. Refer to detailed wet sanding demonstrations to understand the technique before attempting it on large panels.
Inspect Every Section Before Moving Forward
After correcting each 2x2-foot section, stop and inspect the surface under a direct light source such as a bright LED detailing work light or natural sunlight at an angle. Hold the light close to the surface and look for remaining haze, dull patches, or areas where chalking persists. Any missed oxidation will be locked under your protective coating later and will cause premature failure. Catching inconsistencies now, before moving on to the next section, keeps the entire job uniform and professional in appearance. Refer to guidance from experienced detailers on what a fully corrected gelcoat surface should look like under inspection lighting.
Never Work in Direct Sunlight or on Hot Surfaces
This warning cannot be overstated: compounds applied to a hot or sun-baked surface flash dry within seconds, well before the abrasives have time to do their work. When compound flashes too quickly, it bonds to the surface rather than breaking down oxidation, leaves stubborn residue, and can create heat buildup that damages the gelcoat. Always position your RV in full shade, work during cooler morning or evening hours, and touch the surface with your palm before starting each section. If the gelcoat feels warm to the touch, wait or use a water mist to cool it down before applying any product.
Step 3: IPA Wipe-Down and Surface Inspection
With the oxidation physically removed in Step 2, many beginners make the mistake of reaching straight for their sealant or coating. Do not skip what comes next. The IPA wipe-down is a short but non-negotiable step that separates a lasting result from one that fails within weeks.
What an IPA Wipe-Down Actually Does
Polishing compounds and finishing products contain oils, lubricants, and fillers that temporarily make a surface look better than it actually is. These residues settle into the pores of your gelcoat and create an oily film that masks hidden haze, remaining swirl marks, and unaddressed oxidation patches. An IPA wipe-down strips all of that away, revealing the true, bare surface condition so you can see exactly what you are working with before committing to any protective layer.
How to Mix and Apply It Correctly
Mix isopropyl alcohol and distilled water at a 70/30 ratio, meaning 70 parts IPA to 30 parts water. Use distilled water rather than tap water to avoid introducing minerals back onto the surface. Lightly mist the solution onto a clean, folded microfiber cloth rather than spraying directly onto the panel. Wipe in straight, overlapping passes from one end of each panel to the other, flipping to a fresh section of the cloth frequently. Avoid circular motions entirely, as they can reintroduce swirl marks into the corrected surface. You can find additional guidance on DIY IPA panel wipe preparation if you want to dial in your mix further.
Inspecting the Surface Under Light
Once the IPA has fully evaporated, position a panel inspection light or a standard work light at a low, nearly parallel angle to the surface. This raking light technique catches defects that overhead lighting completely hides. Move the light slowly and systematically across each section, looking for any remaining haze, swirl marks, or dull patches that need one more light polish pass before you proceed. This inspection stage is well documented in professional oxidation removal workflows as the final quality check before protection.
Why Skipping This Step Costs You
Trapping polishing oils or compound residue beneath a sealant or ceramic coating disrupts adhesion at the molecular level. The protective layer cannot bond properly to a contaminated surface, which leads to premature failure, uneven coverage, and oxidation returning faster than expected. This is one of the most common DIY mistakes made during RV restoration.
At this stage, your RV’s gelcoat should look its absolute best: uniformly glossy, smooth to the touch, and completely free of visible defects. This is the clean, corrected baseline that your protection product needs in order to perform and last.
Step 4: Protect the Surface So Oxidation Does Not Return
All the correction work you completed in Steps 1 through 3 can begin unraveling within weeks if you stop here. Bare, freshly corrected gelcoat is essentially naked and defenseless against the same UV radiation, oxygen, and moisture that caused the oxidation in the first place. The compounding and polishing process removes the damaged outer layer, which means the fresh gelcoat underneath has zero protection left. Without a barrier applied immediately after your IPA wipe-down, visible dullness and chalking can return in as little as four to eight weeks, especially for RVs stored outdoors under direct sun. Applying protection is not the finishing touch, it is what determines whether your entire effort lasts months or years.
Wax and Sealants vs. Ceramic Coatings: Know the Difference
Not all protection is equal, and understanding the gap between your options will help you make the right long-term decision. Traditional marine-grade waxes and polymer sealants are widely available, easy to apply by hand, and provide a reasonable starting point. However, their protection lifespan typically ranges from just 4 to 12 weeks depending on UV intensity, how often you wash the RV, and whether it is stored outdoors or undercover. They sit on top of the gelcoat rather than bonding to it, which means heat, rain, and repeated washing gradually strip them away. For an RV stored outside in Idaho’s sunny, high-desert climate, you could be reapplying wax four or more times per year, which adds up in both cost and labor.
Ceramic coatings work on an entirely different level. A quality SiO2-based ceramic coating chemically bonds to the corrected gelcoat surface, forming a hard, durable sacrificial layer that delivers 2 or more years of UV resistance and hydrophobicity with proper maintenance. Research supports this advantage clearly: ceramic-coated RV surfaces show up to 75% less oxidation compared to uncoated surfaces over a two-year period, making the investment in a coating far more cost-effective than repeated waxing over the same timeframe. For more information, explore our ceramic coating services for RVs.
A Critical Warning You Cannot Ignore
If you are considering a ceramic or graphene coating, one rule is absolute: never apply it over an oxidized or improperly corrected surface. When a coating bonds to dead, damaged gelcoat rather than healthy substrate, it locks that damage in permanently. The result is premature coating failure, poor adhesion, and a surface that requires full coating removal and reapplication before anything can be fixed. This is exactly why Steps 1 through 3 exist and why the IPA wipe-down in Step 3 matters so much. The coating is only as good as the surface beneath it.
Professional Installation: The Right Way to Coat Your RV
For homeowners and first-time RV owners, professional ceramic coating installation removes all the guesswork and risk. Eagle Star Detail, a certified System X installer serving Eagle, Idaho and the surrounding Treasure Valley area, ensures every coating is applied to a fully corrected, contamination-free surface using professional-grade products. System X certified coatings include lifetime warranty options on select premium packages, meaning your investment is backed far beyond anything a wax or DIY sealant can offer. Eagle Star Detail also offers mobile service, bringing the full correction and coating process directly to your home or storage facility. When long-term protection, deep gloss, and genuine peace of mind are the goal, professional installation is the clear choice.
DIY vs. Professional RV Oxidation Removal: Honest Cost Comparison
Once you understand the full oxidation removal process, the natural question becomes whether to tackle it yourself or hand it off to a professional. The honest answer depends on your budget, experience level, and the severity of what you are working with. Here is a clear breakdown of what each path actually costs.
What DIY Realistically Costs
The upfront investment for a proper DIY oxidation removal setup typically falls between $170 and $420. That breaks down to a dual-action polisher ($80 to $200), cutting compound and finishing polish ($30 to $60), foam or wool pads plus microfiber towels ($40 to $80), and a protection product such as a marine wax, sealant, or entry-level ceramic coating ($20 to $80). These are one-time equipment costs for many items, but consumables like pads and compounds will need replenishing on a large rig.
What that cost estimate does not capture is time. On a 35 to 40-foot Class A motorhome, expect 10 to 20 hours of physical labor spread across multiple sessions, working in small 3x3-foot sections from a ladder. For a first-timer, add additional hours for learning curve and potential re-work. That time commitment is significant and should factor heavily into your decision.
What Professional Service Costs
Professional pricing is structured around linear footage and oxidation severity. According to current RV detailing pricing data, mild oxidation removal typically adds $100 to $300 on top of a standard detail service. Severe oxidation on a 40-foot Class A motorhome, the kind involving deep chalking and years of neglect, can range from $800 to $2,000. Full cut-and-buff work is generally priced at $20 to $40 per linear foot, which reflects both the labor intensity and the commercial-grade equipment required.
The Real Risks of Going DIY
The cost savings of DIY come with genuine risks that beginners consistently underestimate. Incomplete removal is common, especially on large surfaces where fatigue sets in and sections get rushed. Improper polisher speed or pad selection creates swirl marks that are sometimes worse than the original oxidation. Aggressive compounding near decals, graphics, or slide seals can cause irreversible damage. Most critically, applying wax or sealant over oxidation that was not fully corrected seals the damage into the surface, making future correction significantly harder and more expensive.
Why Professionals Deliver Better Results on Moderate to Severe Cases
For anything beyond light surface oxidation, professional service provides advantages that DIY equipment simply cannot match. Certified detailers use commercial-grade, high-torque polishers with compound systems matched precisely to gelcoat condition. Trained technicians assess oxidation depth visually before choosing a correction approach, avoiding over-aggressive cutting that thins the gelcoat. Professionals also offer warranty-backed protection options; certified ceramic coating installations, for example, can carry lifetime warranty coverage, a guarantee no DIY application provides. Check out our mobile RV detailing services to learn more about professional options.
The Mobile Advantage in the Treasure Valley
For RV owners in the Treasure Valley area, professional mobile detailing removes one of the biggest obstacles to getting the work done properly. You do not need to drive a 40-foot motorhome to a shop. Eagle Star Detail comes directly to your home, driveway, or storage facility, fully equipped with water, power, and professional-grade products. The work gets done where your rig lives, saving you the logistics and stress of transporting a large vehicle across town.
For mild oxidation on a smaller trailer and an owner with some experience, DIY is a reasonable option with the right tools. For moderate to severe oxidation, larger motorhomes, or anyone without prior paint correction experience, professional service is the smarter investment, protecting both your rig and your budget from costly mistakes.
Idaho RV Oxidation Prevention: What Treasure Valley Owners Need to Know
If you live in the Treasure Valley and own an RV, you are dealing with one of the worst UV environments in the country. Boise averages a UV index of 10.9 in July, reaching extreme levels that coastal and northern climates simply do not see. Coastal regions benefit from marine layer cloud cover that diffuses UV radiation throughout the year, while northern climates have shorter summer days and more frequent overcast weather. The Treasure Valley gets none of that relief. High altitude, low humidity, minimal cloud cover, and prolonged direct sun create conditions where UV radiation hits gelcoat surfaces harder and more consistently than almost anywhere else. That combination accelerates oxidation significantly, and unprotected gelcoat can begin showing visible chalking and fading within a single season of exposure.
A Seasonal Prevention Schedule for Treasure Valley RV Owners
Staying ahead of oxidation here requires a consistent, season-specific routine rather than occasional maintenance.
- Spring (pre-season): Perform a thorough wash and full surface inspection before your first trip. Look for early signs of chalking, dull patches, or areas where water no longer beads. Apply a UV protectant or refresh your sealant to rebuild the protective barrier after winter storage.
- Summer: Wash monthly at minimum, and more frequently after dusty trips or long travel days. Reapply a UV protectant spray or ceramic booster as needed. This is the highest-risk season in Idaho, and consistent maintenance is the only reliable defense.
- Fall: Complete a full wash, inspect your protective coating carefully, and apply or refresh your sealant before putting the RV into storage. Addressing any weak spots now prevents damage from compounding over winter.
- Winter: Use a breathable, UV-resistant cover or store the RV in a building or carport. Even in cooler months, clear days with reflected light from snow and ice still contribute to cumulative UV damage.
Storage Decisions Matter More Here Than Almost Anywhere
Uncovered outdoor storage in Idaho’s summer sun is genuinely risky. Without a cover or carport, unprotected gelcoat can develop visible oxidation within one season. Even partial shade from a carport slows degradation considerably. RVs stored indoors are in better shape, but indoor storage does not eliminate the need for annual inspection and protective maintenance. Wax, sealant, and coating layers degrade over time from temperature cycling, dust, and residual UV exposure, so annual upkeep is still essential even for stored units.
For Treasure Valley owners, ceramic or graphene coatings represent a genuinely cost-effective long-term investment. Traditional waxes last only a few months under Idaho’s dry heat and intense sun, requiring repeated reapplication throughout the season. Ceramic-coated RV surfaces show up to 75% less oxidation over a two-year period compared to uncoated surfaces, and a professional-grade coating can maintain that protection for several years. The initial investment is higher, but the reduced maintenance frequency and preserved resale value make it the more economical choice for anyone parking an RV under Idaho skies.
Signs You Should Skip DIY and Call a Professional Instead
Not every RV oxidation situation belongs in the DIY category. Knowing when to step back and call a professional can save you time, money, and the risk of making a costly problem significantly worse. Run through this checklist before you start mixing compounds.
Your fingertip swipe test picks up heavy chalk and the surface feels rough or pitted. A light dusting of chalk after a swipe signals mild oxidation that a beginner can reasonably address. But when your finger comes away coated in thick white residue and the panel feels gritty or textured rather than simply dull, you are dealing with moderate to severe gelcoat breakdown. Casual compound application will not reach the depth of damage, and aggressive DIY work without the right rotary equipment risks burning through the remaining gelcoat entirely. Incomplete removal also means oxidation returns faster than it should.
Your RV is 30 feet or longer. Scale is one of the most underestimated challenges in RV oxidation removal. A 35-foot Class A motorhome can take a professional crew with commercial-grade rotary equipment 8 to 12 hours or more to correct properly. Without consistent machine speed, pad pressure, and product application across that much surface area, the results are predictably uneven, with holograms in some panels and untouched oxidation in others. Most beginners either give up midway or finish with results that require a professional to redo anyway.
You plan to apply a ceramic or graphene coating after restoration. This is a hard stop for DIY. Ceramic coatings bond permanently to the gelcoat surface, which means any oxidation, contamination, or surface inconsistency left behind gets sealed in and accelerates coating failure. Professional installers, including certified System X applicators, ensure complete oxidation removal, correct surface chemistry for gelcoat compatibility, and application in controlled conditions that support warranty coverage. Cutting corners on prep voids the investment entirely.
The gelcoat shows crazing, stress cracks, or delamination. These are structural warning signs, not cosmetic ones. Running an abrasive compound over a crazed or cracked surface can widen the damage, force contaminants deeper into the substrate, and remove protective gelcoat thickness without fixing the underlying problem. A professional can assess whether the damage is cosmetic or structural before any correction work begins, preventing water infiltration and further deterioration.
Previous DIY attempts left swirl marks, haze, or uneven correction you cannot polish out. Finishing polish is a refinement tool, not a rescue tool. If prior work left holograms or patchy results, the surface needs a full multi-stage professional correction that starts with a heavier cut to reset the surface uniformly before any refinement is possible. Trying to layer more DIY product over existing damage compounds the problem rather than solving it.
Taking the Next Step to Restore and Protect Your RV
Restoring your RV’s gelcoat is a structured process that builds on each stage. You begin with an honest severity assessment, move into thorough washing and decontamination, execute mechanical correction with the right compounds and polisher, complete an IPA wipe-down to inspect the true surface, and then apply immediate protection. Every step depends on the one before it.
That final protection step is not optional. Freshly corrected gelcoat is vulnerable, and without a proper barrier, UV exposure and moisture will restart oxidation within weeks. The protection layer you choose determines how long your results actually last. Traditional waxes offer months of coverage at best, while a certified ceramic coating delivers years of UV resistance, hydrophobicity, and low-maintenance gloss. For professional-grade solutions, explore our full-detail service options and ceramic coating programs.
DIY correction is a realistic option for light surface oxidation, but moderate to severe cases benefit significantly from professional-grade multi-stage correction and certified coating installation. Eagle Star Detail provides mobile RV oxidation removal and System X certified ceramic coating installation serving Eagle, Boise, and the broader Treasure Valley area, with all services completed at your home or storage location.
Before attempting correction on anything beyond light chalking, request a professional assessment first to avoid surface damage and ensure the right approach for your specific RV.
Conclusion
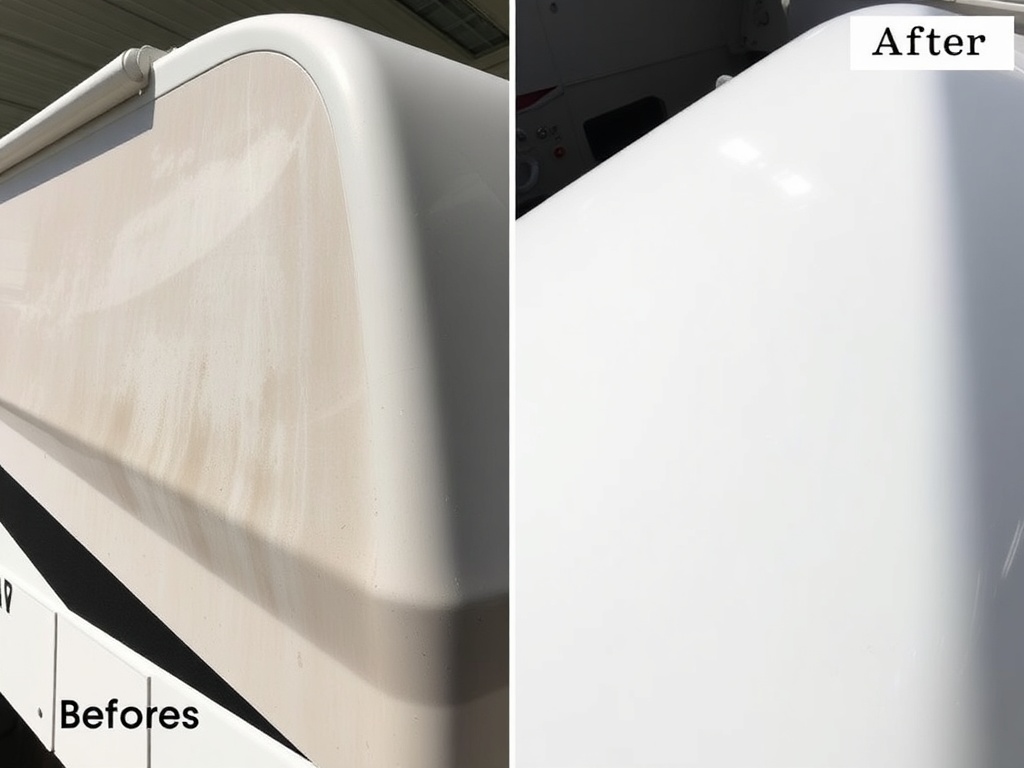
Restoring your RV’s finish is completely achievable without professional help or a hefty price tag. To recap the key takeaways: oxidation is caused by prolonged UV and weather exposure, early detection makes the removal process significantly easier, using the right compounds and tools ensures a thorough and lasting result, and applying a quality sealant afterward is essential for long-term protection.
Now it is time to put this knowledge to work. Gather your supplies, pick a shaded spot on a mild day, and start with a small test section to build your confidence before tackling the full exterior.
Your RV represents freedom, adventure, and countless memories on the road. A faded, chalky exterior does not have to define it. With a few hours of effort, you can restore that showroom shine and hit the road looking as good as you feel.
Frequently Asked Questions
How long does RV oxidation removal take? A complete DIY oxidation removal project on a 35-40 foot motorhome typically takes 10-20 hours spread across multiple sessions. Professional services complete the same work in 8-12 hours or less using commercial-grade equipment.
Can I remove oxidation without a polisher? Hand polishing with compounds is possible but extremely labor-intensive and rarely produces professional-quality results. A dual-action polisher is strongly recommended for any oxidation beyond very light surface haze.
What’s the difference between oxidation on my RV and my car? RV gelcoat is thicker and more porous than automotive clear coat, requiring marine-specific products and techniques. Standard automotive compounds are typically too mild for gelcoat restoration.
How often should I protect my RV after removing oxidation? Wax and sealants typically last 4-12 weeks before reapplication is needed. Ceramic coatings last 1-3+ years with proper maintenance, making them the more cost-effective long-term choice for Treasure Valley owners facing intense UV exposure.
About the Author
David Faustina
Founder & Certified Ceramic Coating Installer
David Faustina is a professionally trained and certified detailer specializing in paint correction, ceramic coating installation, and RV detailing. As founder of Eagle Star Detail, he personally works on every vehicle to ensure premium results and customer satisfaction.
Ready to experience professional detailing?
Eagle Star Detail specializes in professional mobile detailing throughout Boise and the Treasure Valley.