Your vehicle’s paint tells a story. Over time, swirls, scratches, and oxidation accumulate from washing, weather, and daily wear. Paint correction is the answer to restoring that showroom finish.
What is Paint Correction?
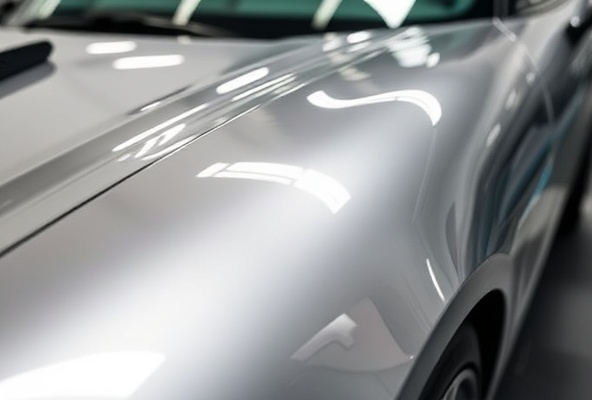
Paint correction is the process of safely removing paint imperfections—swirls, light scratches, water spots, and oxidation—to restore the clarity and depth of your vehicle’s original paint finish.
Common Paint Imperfections
Swirl Marks
The most common paint defect, swirl marks are fine scratches that appear when light reflects off the paint at different angles. They typically result from improper washing techniques.
Hologram Effects
These are fine, hazy patterns in the paint that become visible in certain lighting conditions, often caused by aggressive polishing.
Oxidation
Over time, UV exposure causes the paint’s clear coat to oxidize, creating a dull, chalky appearance.
Water Spots
Mineral-laden water droplets that evaporate leave behind mineral deposits that etch the clear coat.
Light Scratches
Minor scratches from car covers, car washes, or parking lot incidents.
The Paint Correction Process
Step 1: Assessment
We thoroughly inspect your paint under various lighting conditions to identify all defects and determine the appropriate correction level needed.
Step 2: Surface Preparation
The paint is meticulously cleaned and decontaminated to remove any particles that could cause additional scratching during correction.
Step 3: Polishing
Using professional-grade compounds and pads, we carefully remove the damaged clear coat layer that contains the imperfections.
Step 4: Refinement
Sequential polishing with finer abrasives ensures a smooth, uniform finish without holograms or swirls.
Step 5: Protection
After correction, we apply protective coatings to prevent future damage and maintain the restored finish.
Correction Levels
Level 1 - Light Correction
- Removes light swirls and minor defects
- Requires minimal material removal
- Best for well-maintained vehicles
Level 2 - Medium Correction
- Addresses moderate swirls and light scratches
- Removes more of the damaged clear coat
- Ideal for most vehicles
Level 3 - Heavy Correction
- Tackles severe swirls, scratches, and oxidation
- Maximum safe material removal
- For heavily damaged paint
Why Paint Correction Before Ceramic Coating?
Paint correction and ceramic coating are perfect partners:
- Maximizes Ceramic Coating Results - Correction creates a perfect surface for coating application
- Ensures Even Coverage - The coating adheres uniformly to corrected paint
- Protects Your Investment - Correcting defects first prevents them from being sealed under the coating
- Longevity - A properly corrected and coated surface maintains its appearance much longer
DIY vs. Professional Correction
While DIY correction products are available, professional correction is superior because:
- Professional equipment provides better results with less risk of damage
- Technicians have extensive experience reading paint condition
- Professional compounds are more effective and safer for your paint
- Warranty protection on professional work
Maintaining Corrected Paint
After correction, proper maintenance preserves your beautiful finish:
- Use gentle, two-bucket wash methods
- Apply protective wax or sealant quarterly
- Consider ceramic coating for long-term protection
- Avoid automatic car washes
Ready to Restore Your Paint?
Don’t let paint imperfections diminish your vehicle’s appearance. At Eagle Star Detail, we perform expert paint correction that brings your vehicle back to showroom condition.
Contact us today for a free paint assessment. Whether you need light correction or complete restoration, we have the expertise and equipment to deliver exceptional results.
About the Author
David Faustina
Founder & Certified Ceramic Coating Installer
David Faustina is a professionally trained and certified detailer specializing in paint correction, ceramic coating installation, and RV detailing. As founder of Eagle Star Detail, he personally works on every vehicle to ensure premium results and customer satisfaction.
Ready to experience professional detailing?
Eagle Star Detail specializes in professional mobile detailing throughout Boise and the Treasure Valley.